Hi Everyone, I thought it would be helpful to create a resource page for those of you who also want to become food bloggers or bloggers in any genre. I am listing the products and services that I use along with step-by-step instructions about how to start your own food blog.
The page will be continually updated whenever I make new discoveries along the way of my own blogging journey.
Disclaimer: Please note that some of the links below are affiliate links. I only link to the products and services that I trust and wholeheartedly recommend. This is completely free for you. I will earn a small commission if you make qualifying purchases through the links. Again, there is no additional cost to you and it helps me continue doing the work I love (win-win!). Thank you.
Please let me know if you have any questions about anything listed below. I really appreciate your support!
Step 1 Name Your Blog
The first thing you need to do is to name your blog. Coming up with a name for your blog might be one of the hardest steps. Trust me, I’ve been there and it took a lot of effort to find the perfect name. Ideally, you will choose something short, memorable, descriptive, and easy to spell. Once you have come up with a name/domain, you need to check its availability online.
Here is a handy domain name checking tool from Bluehost. Type in your desired domain name, click “check availability” and it will tell you if your domain name is available. If so, register it quickly!
Step 2 Find a Reliable Web Host
Once you have picked your perfect domain name, you need to start with an affordable shared hosting plan that offers automatic WordPress installation. Bluehost is the most popular and recommended web-hosting platform currently on the market.
I highly recommend Bluehost for beginners to grow your blogs because it is affordable, reliable, fast, easy to set up, and offers 24/7 customer support. It has powered over 2 million websites worldwide. Bluehost’s “basic” plan is about as cheap as hosting gets for starters. This is where I got started! They have been very helpful and supportive along the way during my set-up process.
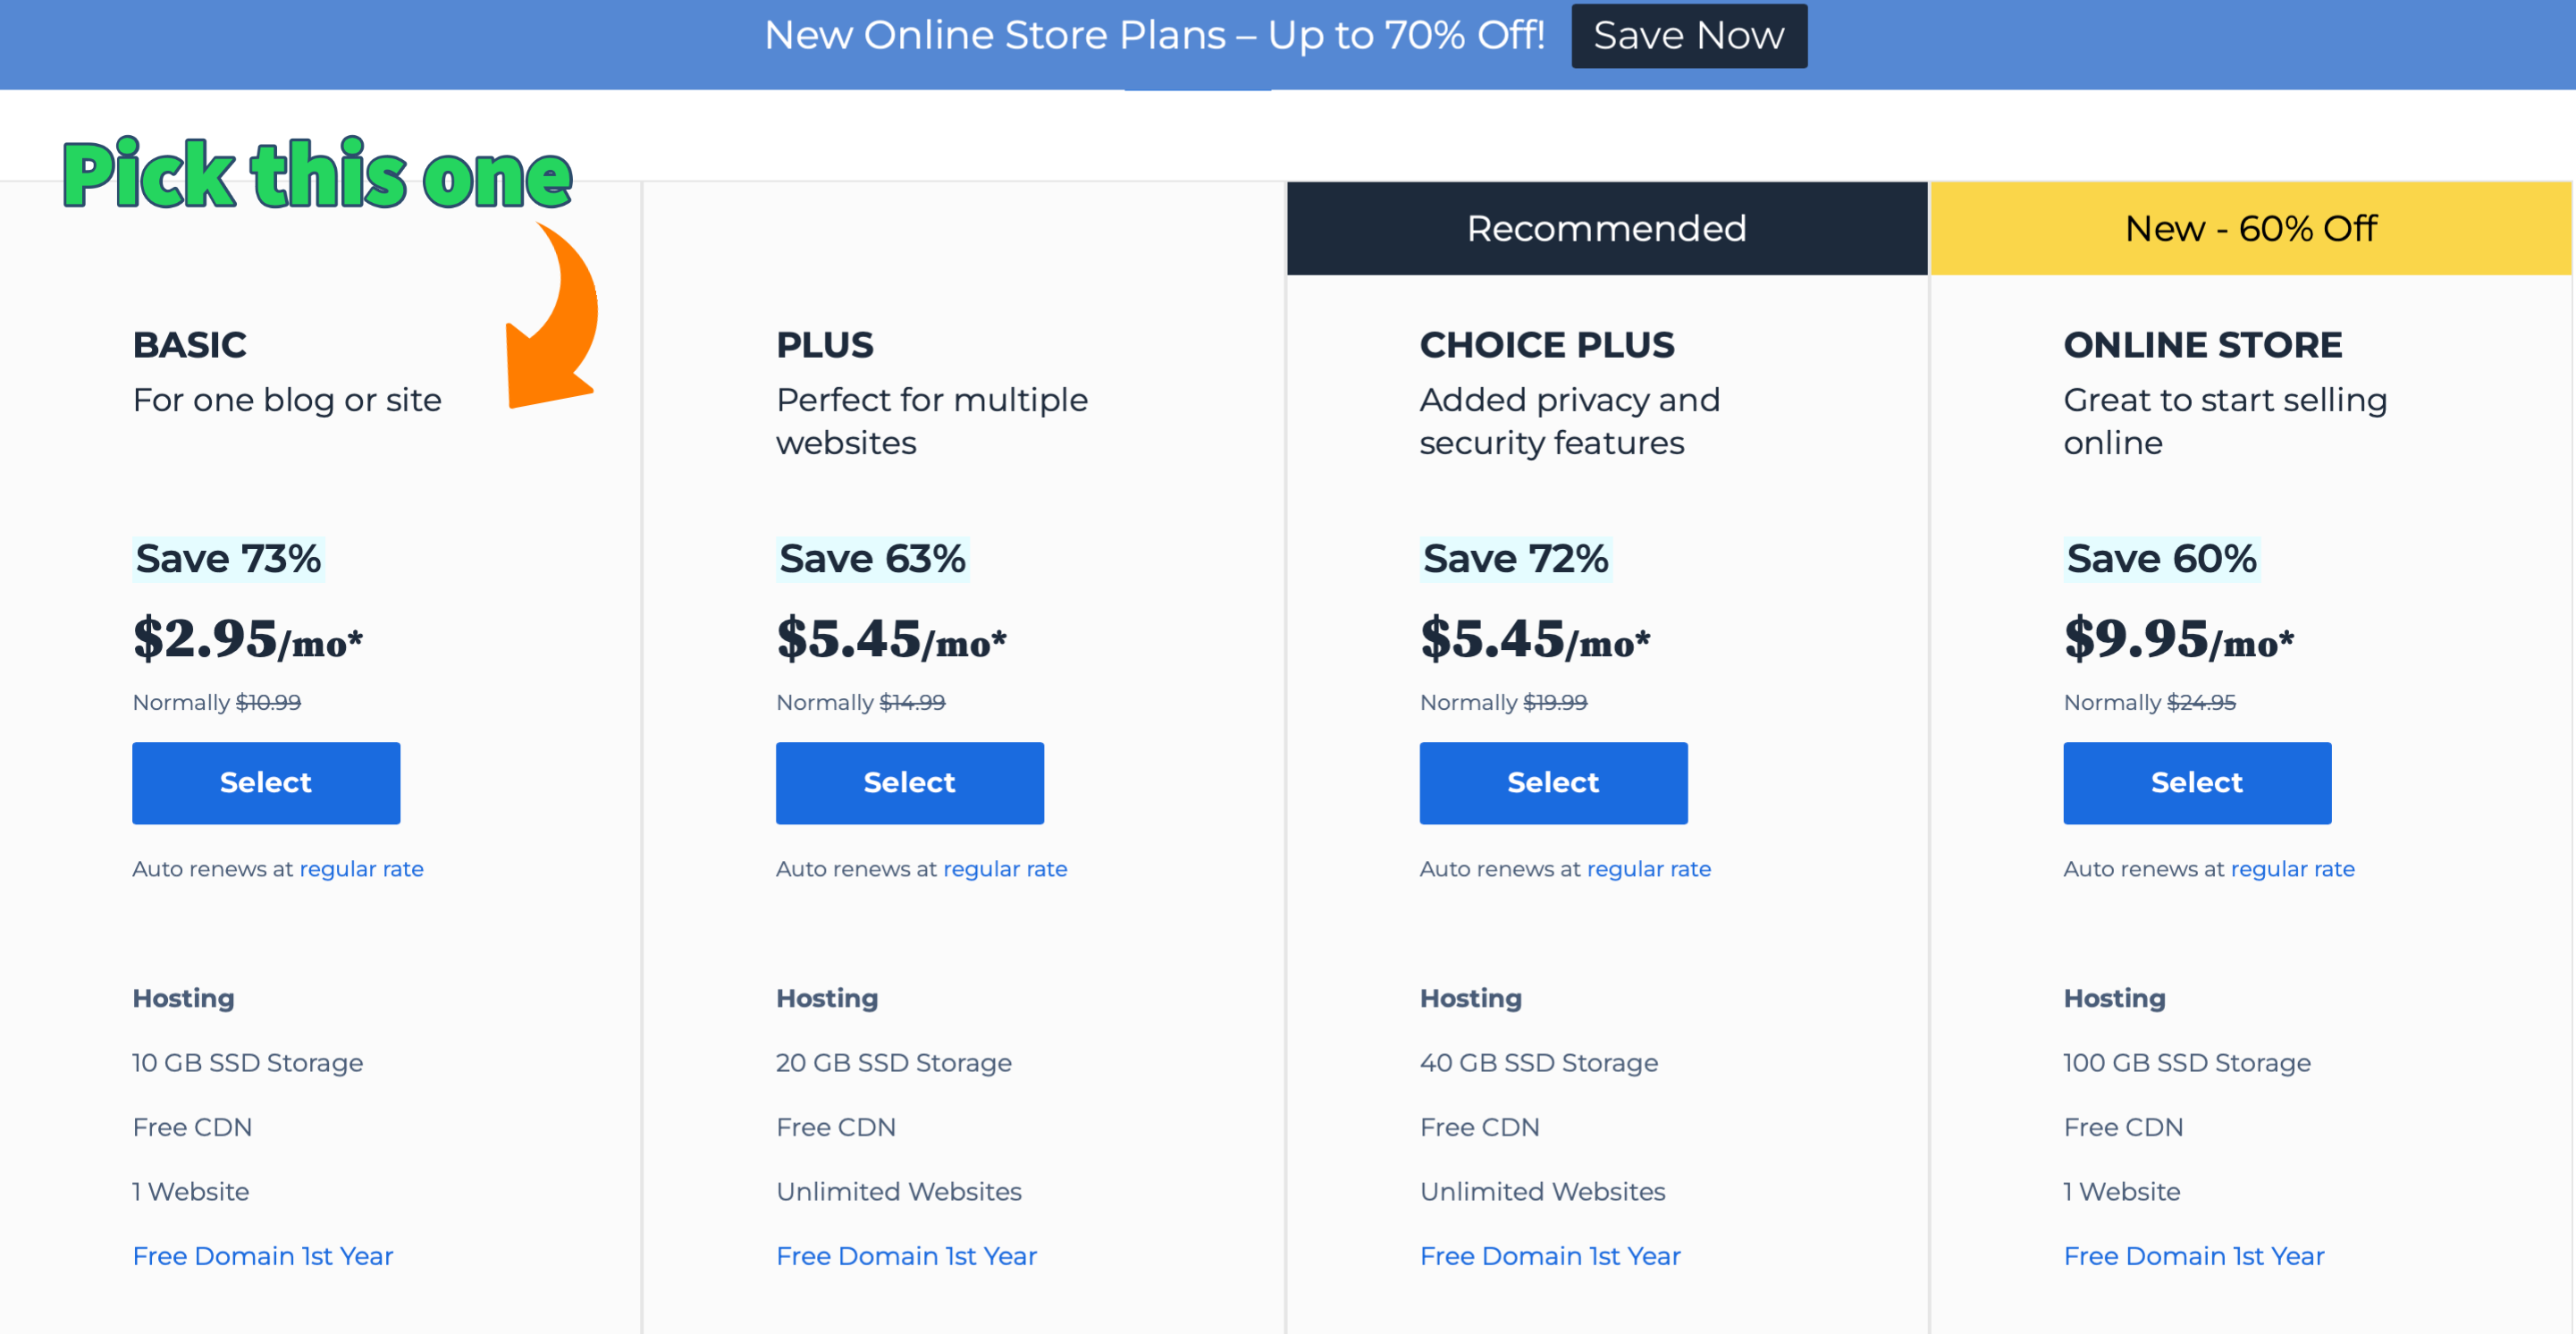
With Bluehost, as with all the other web hosts, you will need to pay for your plan upfront. Don’t worry though–if for some reason you are not satisfied with them, you can cancel within 30 days for a full refund. It’s never too late to start your blog. Why not start it today?
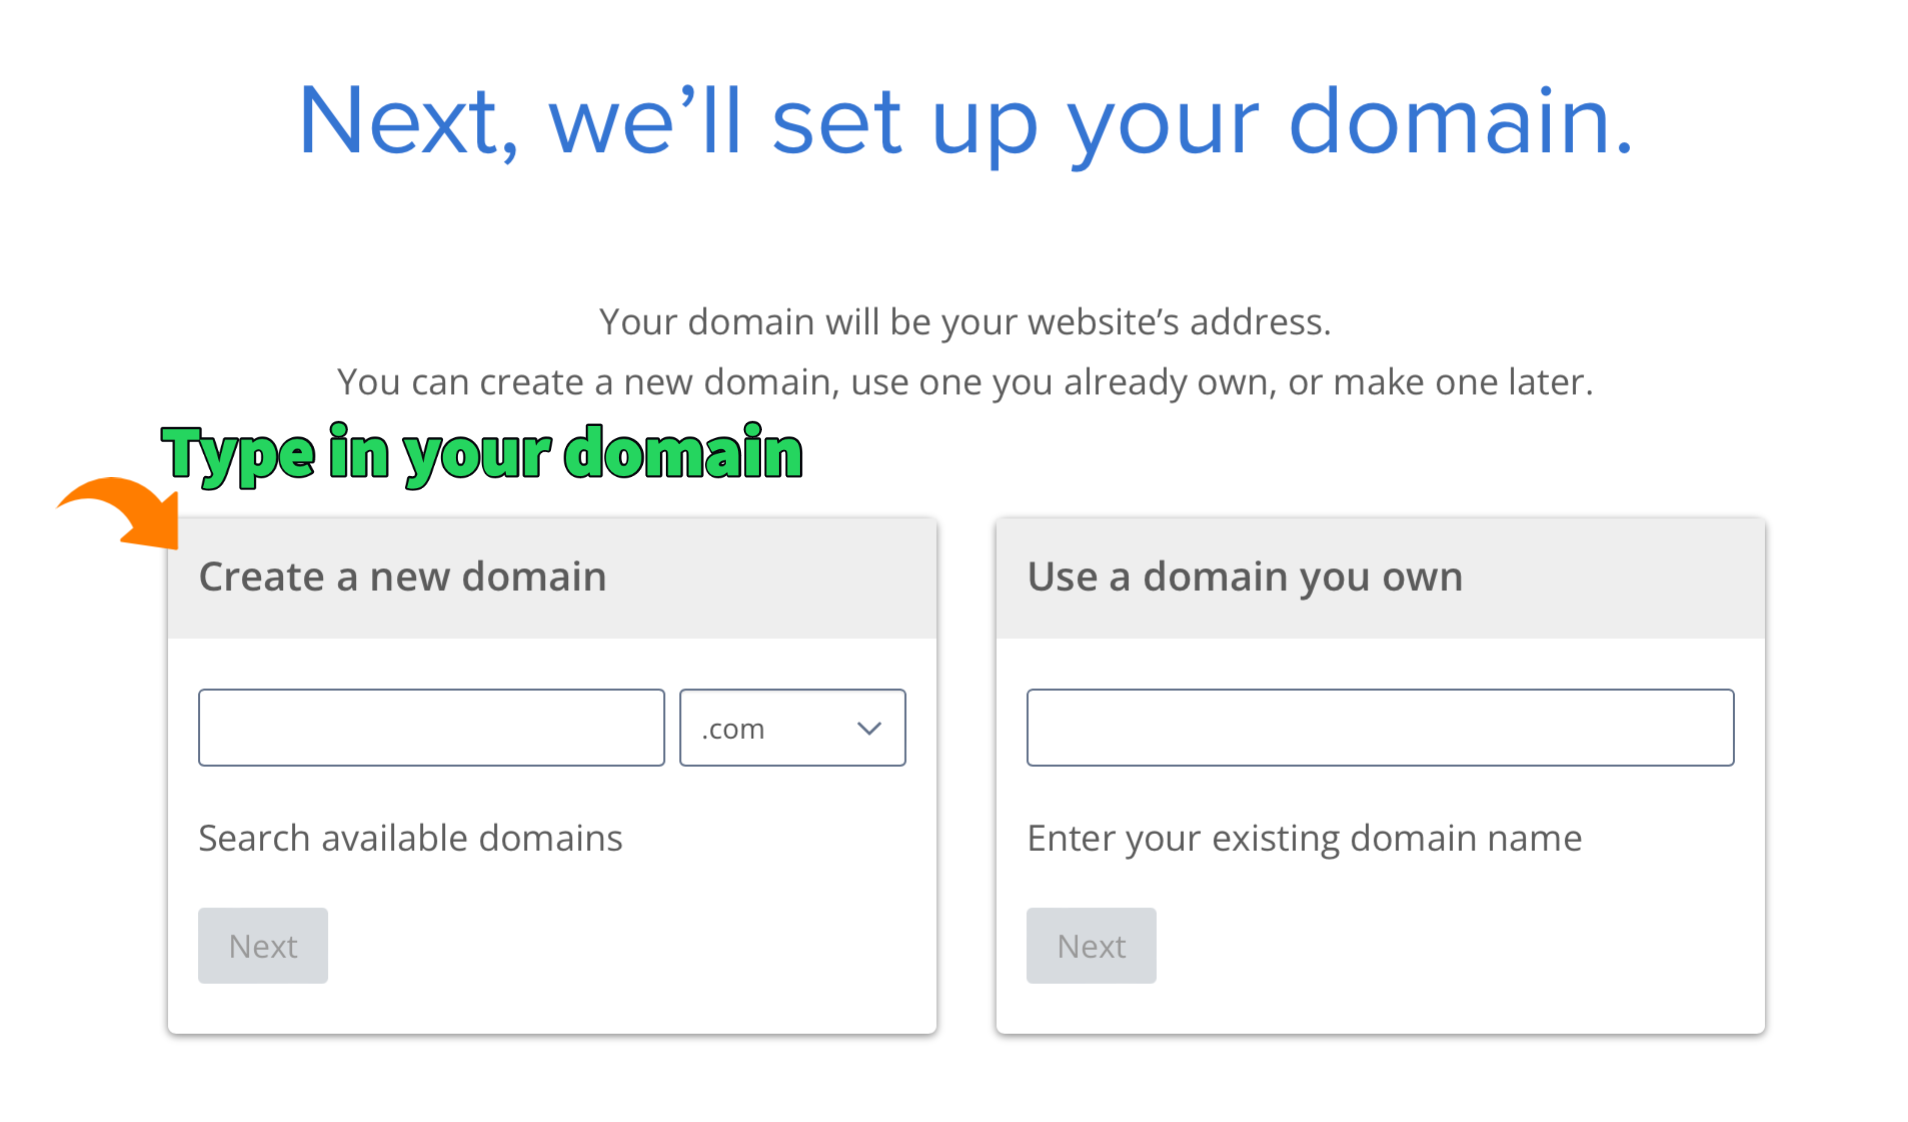
If you have already checked the availability of your domain name beforehand, as suggested, you can just type it in to create a new domain!
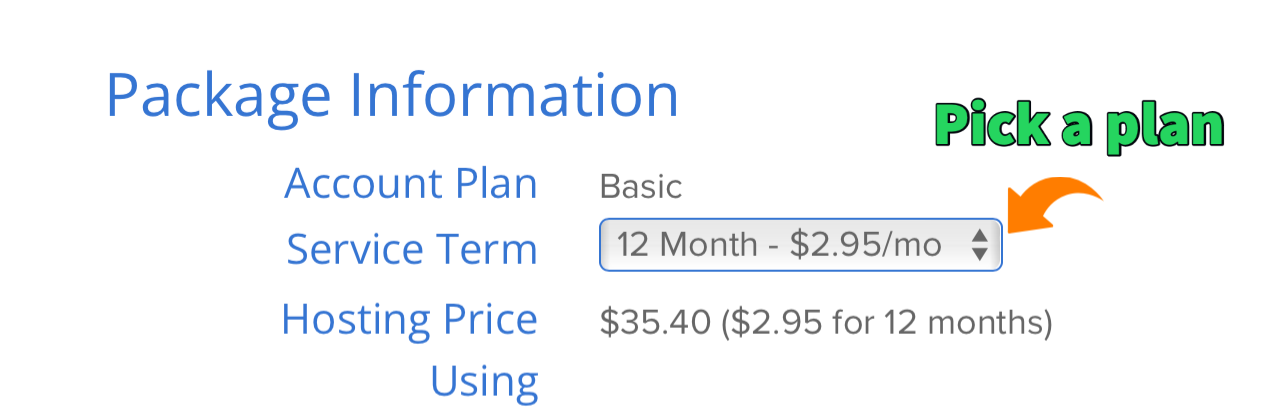
I also recommend that you choose the one-year hosting plan to start with. Of course, this is your choice. The longer terms you choose, the more money you will save. If you are serious about blogging, the one-year plan is a great place to start!
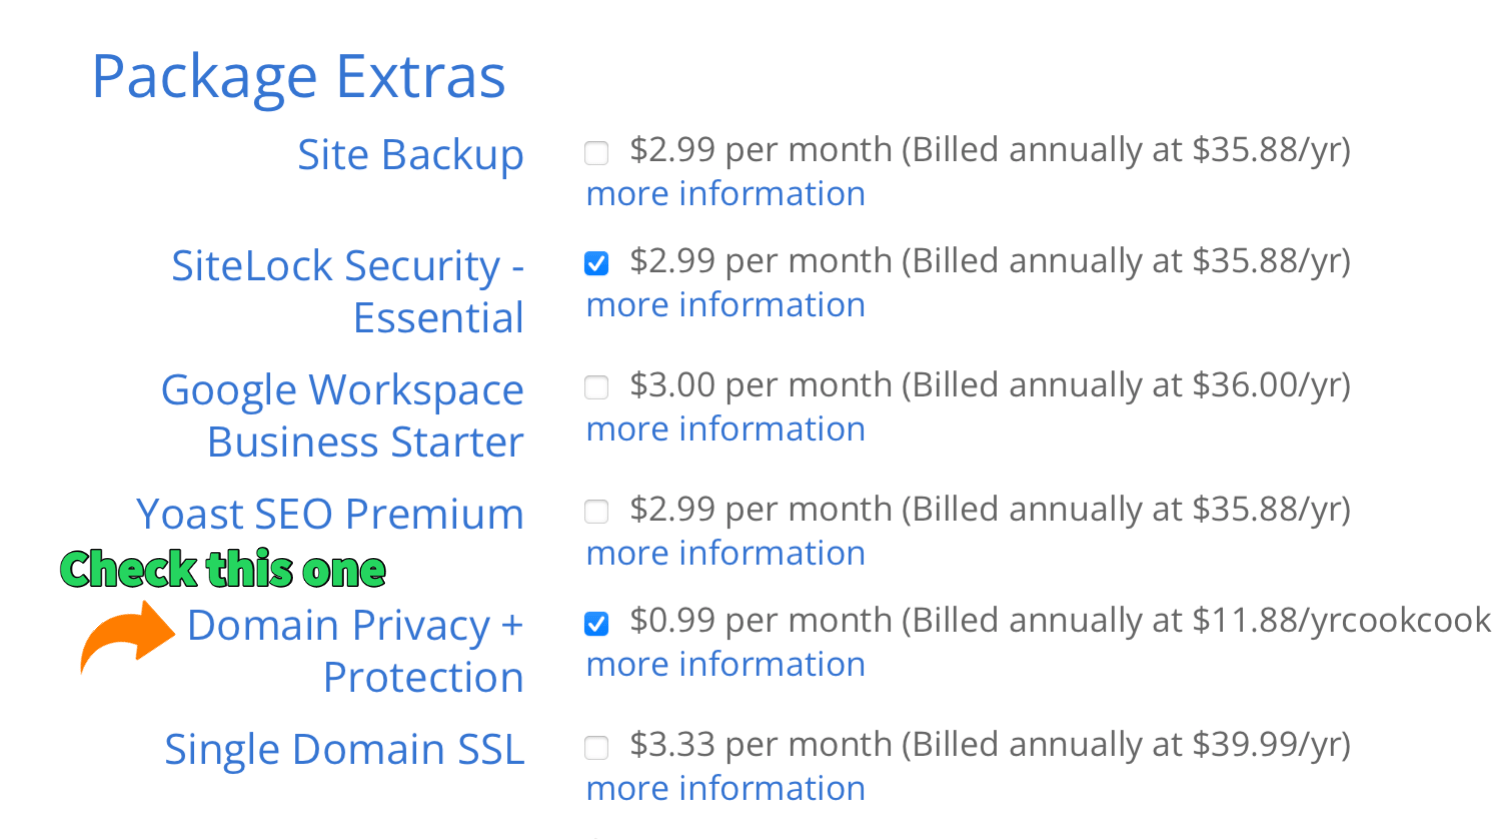
It is important to add Domain Privacy + Protection to your plan because they keep your personal information like address and phone number private from marketers and the general public on the internet. The rest of the options are a personal choice.
Step 3 Install WordPress
Once you have purchased a shared hosting plan with Bluehost as suggested, WordPress will be installed on your site automatically! From the Bluehost portal, you will have direct access to your WordPress website. Wallah! It is that easy!
Step 4 Install WordPress Themes
Your WordPress theme will determine the look and feel of your site, so pick a good one that fits your own style and content.
For beginners, I will recommend that you start with a Free Theme that is available on WordPress and get a feel for it. Make sure to do your research and find the theme for your blog with the best rating.
I am using Kale Pro Theme from LYRATHEMES. I love its clean and simple design that is absolutely beautiful for a food blog. It is also very easy to set up! Besides Kale, they also offer a few different themes on their website. Check them out and you might find one that you really like.
Recommended Premium Themes
Once you want to advance your website with better features, I suggest that you purchase a premium theme from a reputable provider. It will save you time and headaches along the way and your money will be well spent. Here are the Pro Themes that are popular and recommended. They are very well-designed.

Blossom Themes is excellent for both beginners as well as those who wants to have a premium feel. It provides both free and premium themes which I think it’s awesome. Besides for food blogs, they also have beautiful themes for travel and fashion blogs. Check it out and you might find the perfect theme for your blog.

Elegant Themes offers several different products including themes and plugins on their website. I personally have not tried their themes, but they are highly recommended by many bloggers and users. I think Elegant Themes looks great, is easy to use, and I like their friendly design. Take a look and you might find that their themes are for you.

Foodie Pro Theme is perfect for a food blog. It has a minimalist approach and clean design. I especially like its minimalist style with plenty of color and typography options. Check out the Foodie Pro Demo here and the theme is available for one-time purchase fee, currently $129.95.

Brunch Pro Theme is another great theme for food blogs. Brunch Pro is a bit similar to Foodie Pro and has excellent features. It also has a minimalist style, flexible widgets, and a nice recipe index. Check out Brunch Pro Demo here and the theme is available for one-time purchase fee, currently $129.95.

Studio Press offers various options on building WordPress websites. They have high-quality Premium Themes and Genesis Framework, which are well-known and recommended by other bloggers. They have a large community and their community forums are helpful.
Step 5 Install WordPress Plugins
WP Recipe Maker — This is the WordPress plugin I use to enter my recipes. This plugin really makes your recipes look outstanding and it takes care of all the SEO metadata for Google Rich Snippets automatically. It is user-friendly. The free version of this plugin has the basic functions you need, but if you want your recipes really to stand out with more features like nutrition, links, social share, etc. — I highly recommend the premium version. That is what I use and I am very happy with it.

Yoast SEO: This is one of the most recommended WordPress plugins. As you can see it has very high ratings and it is listed as Number 1 SEO plugin for WordPress. It covers all the bases for you and optimizes your content, which is good for Google Search.
Smush: I use this plugin to compress, optimize and lazy load my images on the blog. It helps to save space and increase the blog loading speed. This is important to maximize your user experience.
Wordfence: This is a security plugin I use on my blog to keep it safe. It monitors your blog with a firewall, malware scan, and blocking of suspicious IPs, etc. Wordfence is a very comprehensive WordPress security solution. It is important to have a plugin to protect your website and you never know how many hackers are out there trying to steal your valuable work.
Step 6 Set Up Google Tools
Before you launch your blog, you need to submit your sitemap to Google so that your blog will show up on Google Search when people search the web. More details are provided on Google’s website. Here are the two main tools from Google to set up before launching your blog.
Google Search Console: Make sure to let Google know that your website is ready and is uploaded for running.
Google Analytics: This helps you to track your blog traffic.
Step 7 Create Content & Launch Your Blog
After you set up the basic tools for your blog, the most important step is to create content. Remember to have some recipes/posts ready before launching. I had ten ready to upload immediately. Once you have put content online, you are ready to launch your blog! It is really easy. Just go directly to the WordPress Dashboard, and click “Launch Your Blog!” Your new blog will immediately be visible to everyone on the internet.
Step 8 Happy Blogging
Congratulations! Now you are all set for your new blog. Happy blogging and continue to update your blog with new content. Good luck!
Drive Traffic to your Food Blog
There are many food photo submission sites available for food bloggers. Here are a few that are very popular and recommended. I also use them and submit my photos. After you have submitted photos, it takes a little time to go through the process. Be patient and eventually you will have success. If your photos are rejected after the first submission, analyze why that happened, adjust your photos, and resubmit them! Remember that you are competing with millions of food bloggers who are also trying to get their photos submitted. Do not give up! Once you have learned how the system works, you will see an increase in traffic to your blogs.
More Resources:
- For professional bloggers, If you want to learn more tips and skills for your blog, you should definitely check out Blog with Ben by Ben Cummings! His blog is terrific and he will respond to any of your questions.
- If you want to learn more about different web hosting services, here are a few great articles about Web Hosting:
- Web Hosting Research from Consumer Advocate — which provides some in-depth insights of how to choose your ideal web hosting service.
- The Best Web Hosting Providers of 2023 from Digital.com — they also provide guides and reviews on Website Builders, Ecommerce Platforms, and Email Marketing Services on their website to help your business.


Like!! Great article post.Really thank you! Really Cool.
Thanks!I am happy that you find it helpful.
Hi, what about the privacy policy page? How to create a perfect privacy policy page for the blog? Please help me. How did you create the privacy policy page of your website?
Hi, thanks for stopping by. Unfortunately I cannot provide you any legal opinion on privacy policy page. It needs to comply with the laws of your country or region. If you use WordPress to create your blog, you will be given a template that’s already been drafted. I am sure you can search more information from other websites too.