En enkel guide til begyndere
Ansvarsfraskrivelse: Bemærk venligst, at nogle af nedenstående links er tilknyttede links. Jeg tjener en lille kommission, hvis du foretager kvalificerende køb via linkene. Der er ingen ekstra omkostninger for dig, og det hjælper mig med at fortsætte med at udføre det arbejde, jeg elsker (win-win!). Tak skal du have.
Som madblogger er det første, du skal lære, ud over at lave mad og udvikle opskrifter, hvordan du præsenterer din mad for verden gennem madfotografering. Professionelle reklamefolk siger, at "øjnene spiser først!" Det har de fuldstændig ret i. Hvis din mad ikke er attraktiv, og præsentationen ikke er så god, som den kunne være, vil de, der klikker og liker, gå videre til en anden blogger. Lær at blive madfotograf, og udvid din base!
Med millioner af madbloggere derude er konkurrencen benhård. Der er mange nuancer og masser af færdigheder, man skal lære for at blive god til at blogge om mad. Da jeg startede, vidste jeg bogstaveligt talt ikke noget om madfotografering. Mine første billeder var utiltalende, måske endda grimme, og bestemt ikke præsentable. Jeg har ikke tal på, hvor mange billeder jeg har taget bare for at få ét rigtigt. Jeg er sikker på, at mange af jer har oplevet den samme kamp.
Jeg har lært så meget undervejs, men mine standarder er også blevet højere. Når jeg sammenligner mine første billeder med dem, jeg tager nu, kan jeg se, at min egen madfotografering bliver bedre og bedre. Jeg vil gerne dele mine tips og tanker med dig. Forhåbentlig vil det være en hjælp og inspirere dig til at fortsætte med at gøre de ting, du elsker.
1. Skyd altid i naturligt lys
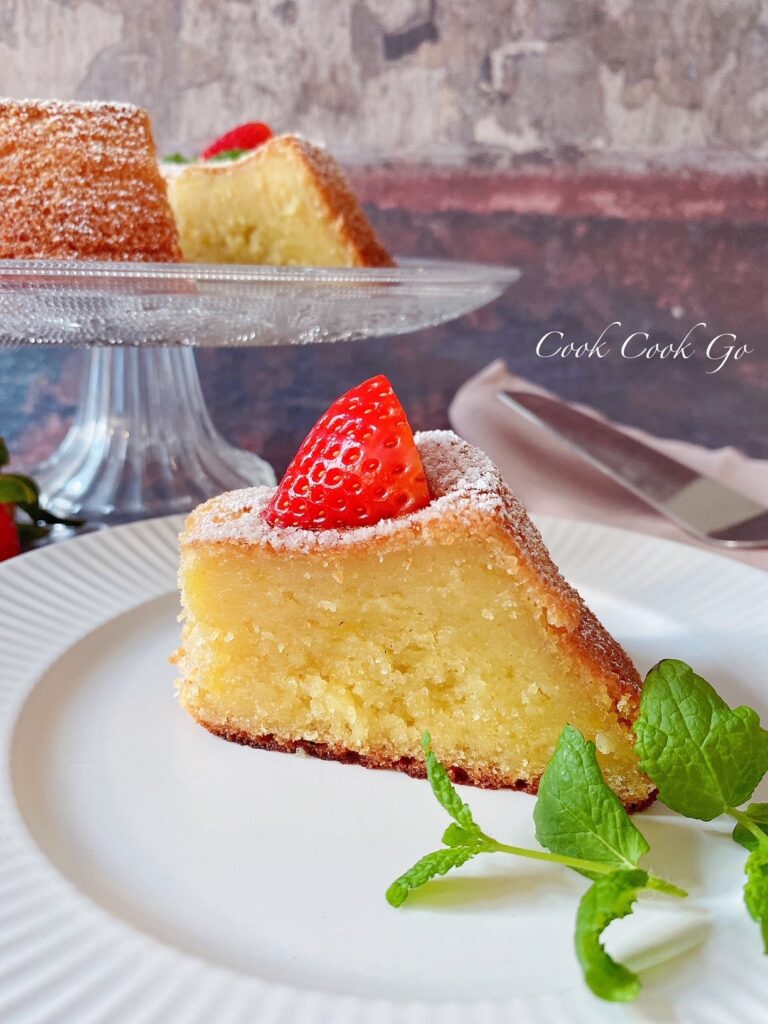
Det første, jeg lærte om, hvordan jeg skulle fotografere min mad, var at fotografere i naturligt lys. Jeg tror, det er et af de vigtigste tips til madfotografering for begyndere. Selv om der findes fantastiske billeder taget i kunstigt lys af superprofessionelle fotografer, er naturligt lys din allerbedste ven, når du starter. Det kræver færre teknikker, mindre udstyr og er absolut budgetvenligt. Overordnet set vil du gerne have, at din mad ser kunstnerisk og naturlig ud på samme tid. Almindeligt dagslys virker helt sikkert magisk, selv om vinteren i København, hvor solskinnet er begrænset.
Du skal være meget opmærksom på intensitet og vinkler, når du fotograferer i naturligt lys. Jeg elsker f.eks. at fotografere min mad på en smuk solskinsdag, men jeg er omhyggelig med ikke at placere maden direkte i sollyset. Det skyldes, at det stærke lys kan skabe mørke skygger og hårde aspekter, som får maden til at se unaturlig ud. I stedet bør du altid finde et sted, hvor sollyset kommer ind fra siden (f.eks. et sted tæt på vinduet). Når du har fundet det perfekte sted i dit køkken eller hus, kan du eksperimentere, indtil du har lært, hvordan du får det bedste billede.
Så gå efter det naturlige lys og undgå at bruge køkkenlys eller loftslamper. Disse lys har en tendens til at skabe uønskede gullige og grønlige nuancer omkring din mad. Sluk lyset og træk gardinerne for, så naturen kan lyse op.
2. Planlæg din optagelse, og vælg dine vinkler
Jeg synes, det er så meget nemmere og mere effektivt at få de billeder, jeg vil have, hvis jeg planlægger det på forhånd. Nogle gange tegner jeg en simpel skitse for at hjælpe mig med at visualisere optagelsen. Prøv det, og du vil måske opdage, at du er mere selvsikker og forberedt og afslutter dine optagelser på en effektiv måde. En af de vigtigste grunde til at planlægge din fotografering er, at forskellige fødevarer har deres egen unikke "herlighedstid". De fleste fødevarer ser bedst ud umiddelbart efter tilberedning, og du vil gerne tage billedet med det samme for at fange de bedste øjeblikke.
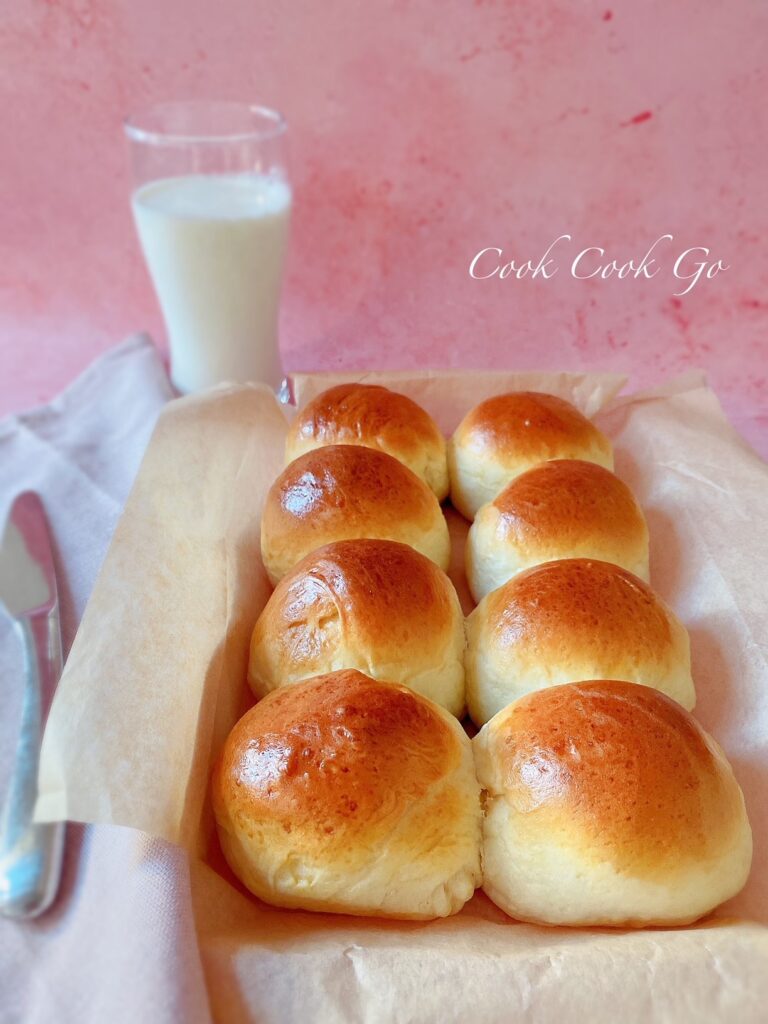
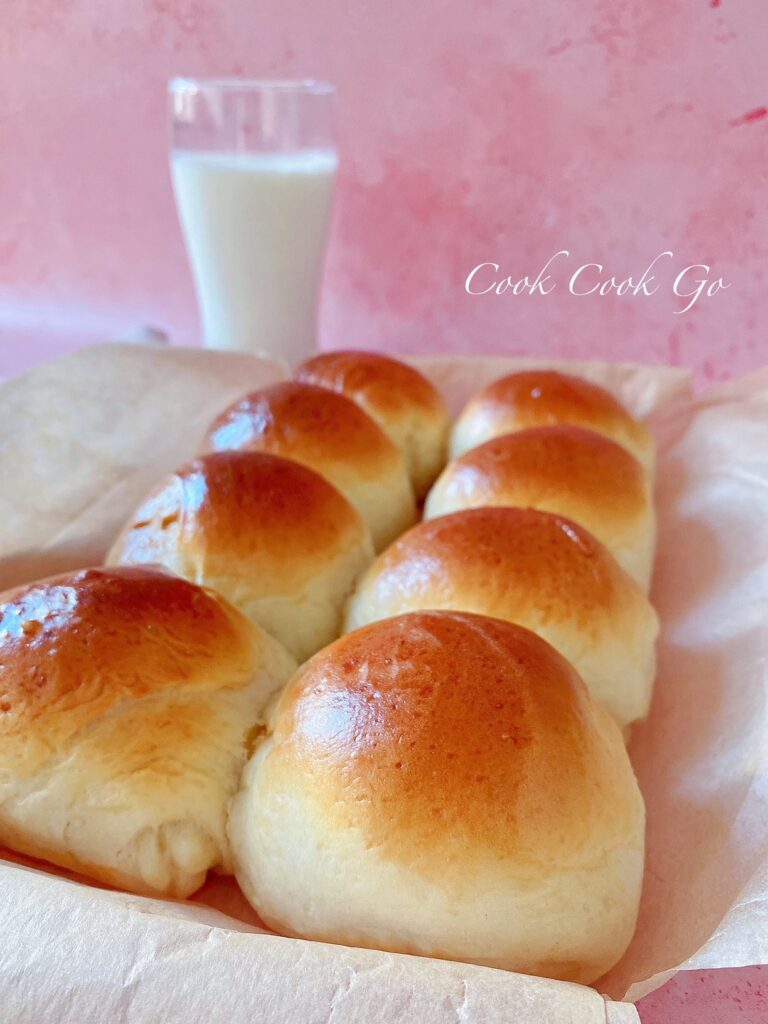
For eksempel skinner det nybagte brød med en blank overside virkelig, når det lige er kommet ud af ovnen. I løbet af et par minutter kan brødets top blive tør og vil ikke se så godt ud på billedet, hvis du ikke tager dine billeder hurtigt - eller pensler mere smør på! Som du kan se, vil du kunne tage de flotteste billeder uden at føle dig stresset, hvis du planlægger din fotografering og ved, hvilken vinkel du vil fotografere i forvejen. Og så får du også lov til at smage en dejlig, varm skive brød.
Ja, jeg er sikker på, at du forstår, hvad jeg mener. Derfor er planlægning og valg af vinkler helt sikkert tidsbesparende og vil gøre din optagelsesproces meget mere effektiv og produktiv.
3. Tell a Story – A little Personal Touch
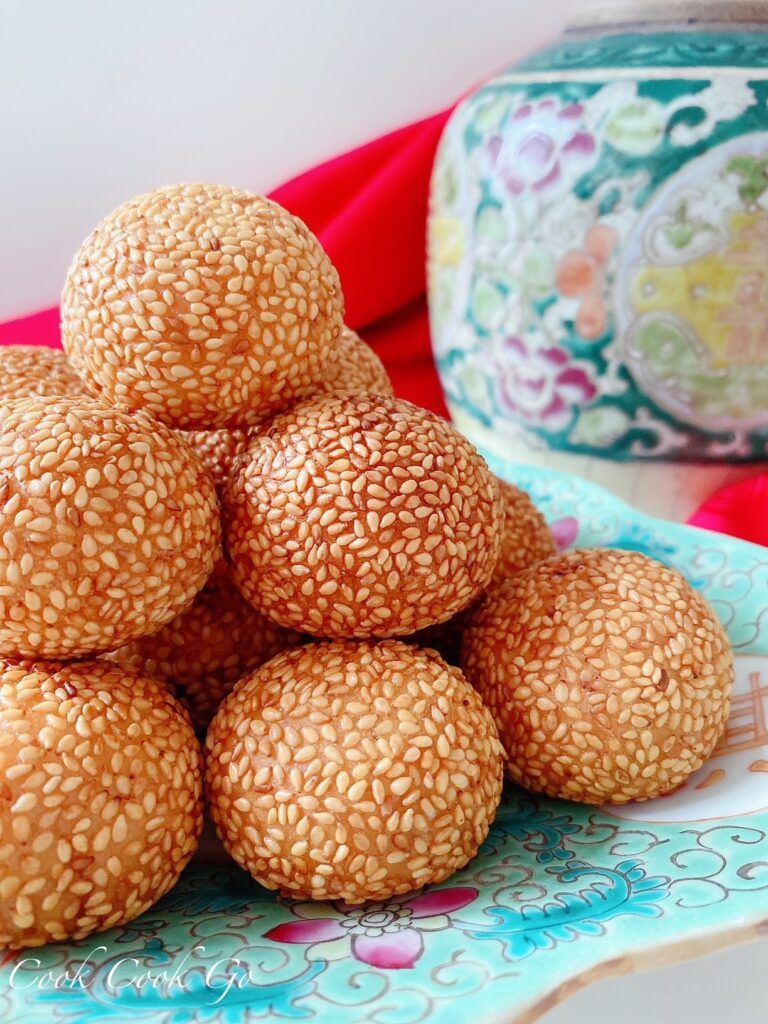
En vigtig måde at tiltrække folk til din mad på er at fortælle en historie i dine billeder. Det kan være gennem din personlige stil, madkultur, landskabsopsætning og farver. Dine billeder skal være unikke, så folk genkender og husker din mad, hver gang de ser den. I modsætning til andre professionelle madfotografer foretrækker jeg enklere elementer i mine billeder. Din mad skal være hovedfokus - historiens helt. Alt andet, som f.eks. service, tøj og tallerkener, skal have en birolle for at dekorere omgivelserne for helten.
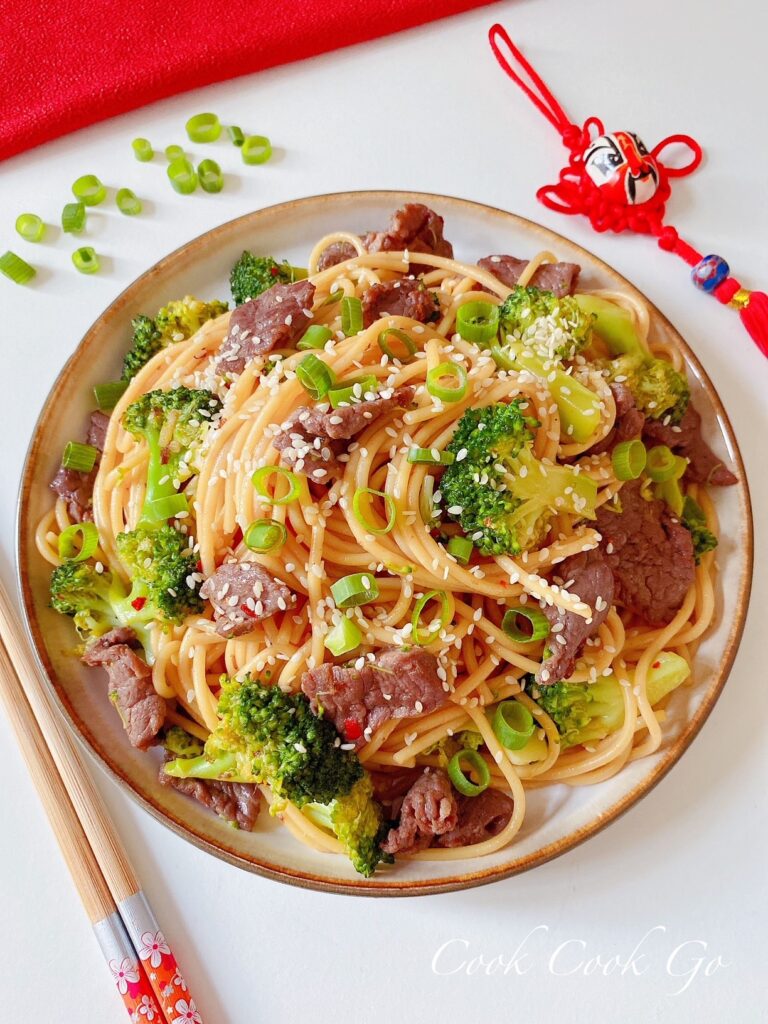
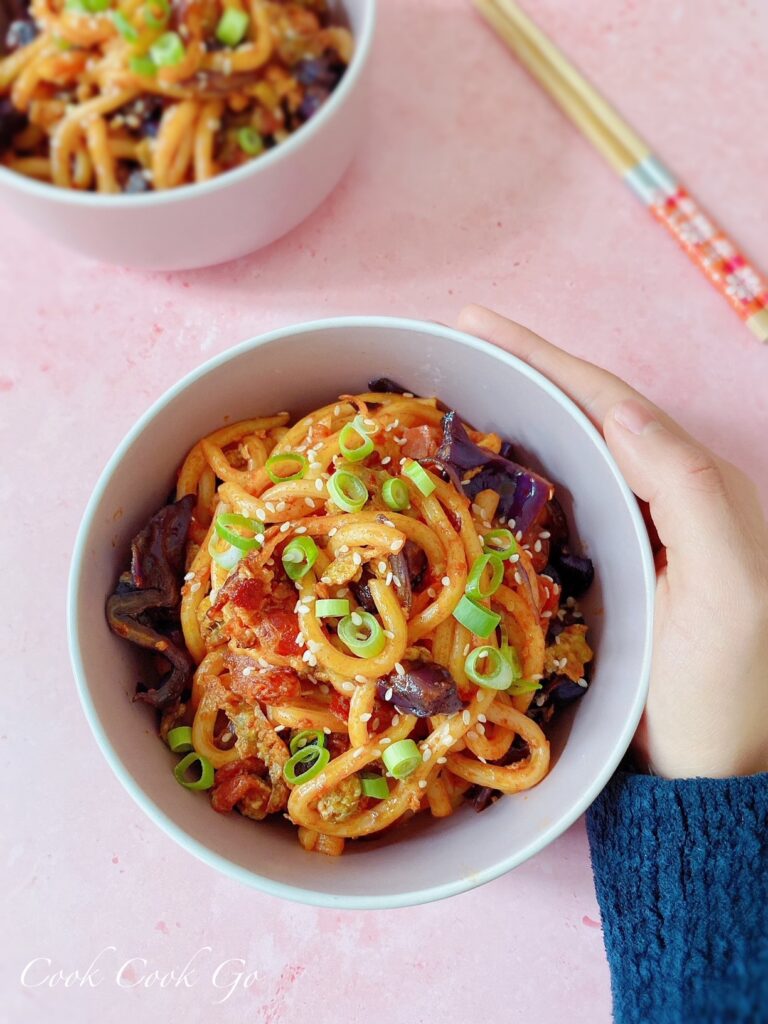
Når jeg f.eks. laver kinesisk mad, vil jeg gerne have, at folk genkender nogle kinesiske elementer i mine billeder i harmoni med den kinesiske madkultur. Det kan være en kinesisk vase, en tallerken eller endda bare en spisepind eller to, der kan levere budskabet. Hvis du vil have et mere personligt præg, kan du vise et menneskeligt element som din hånd, som det ses nedenfor.
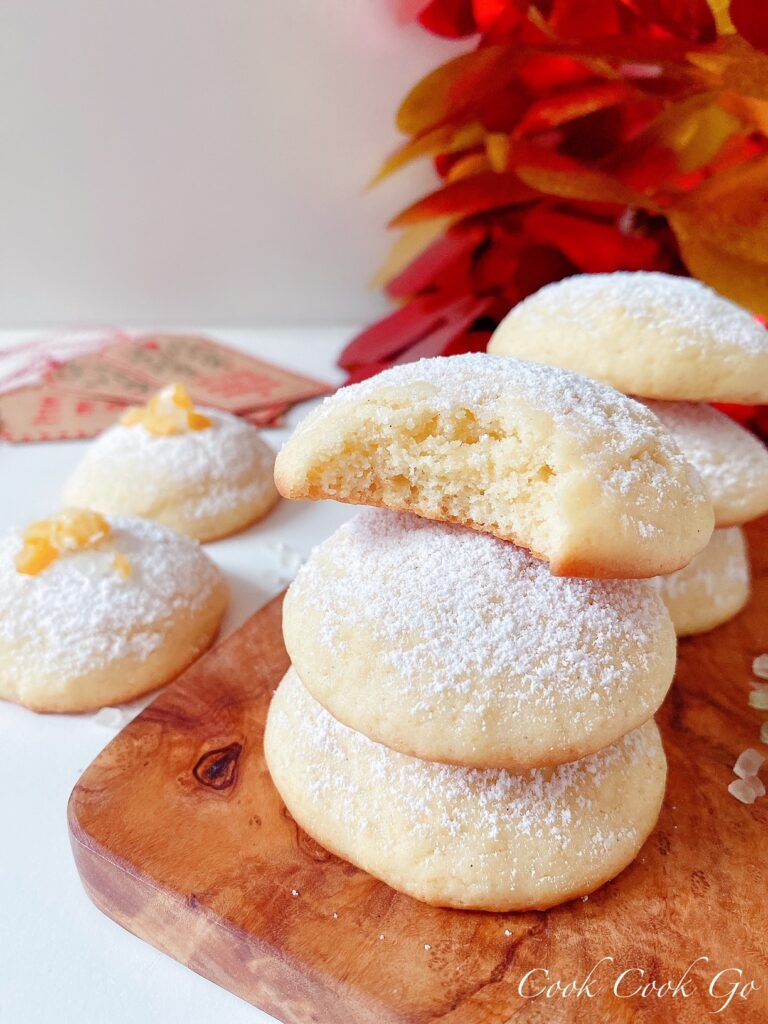
4. Sammensæt dine billeder med linjer og lag
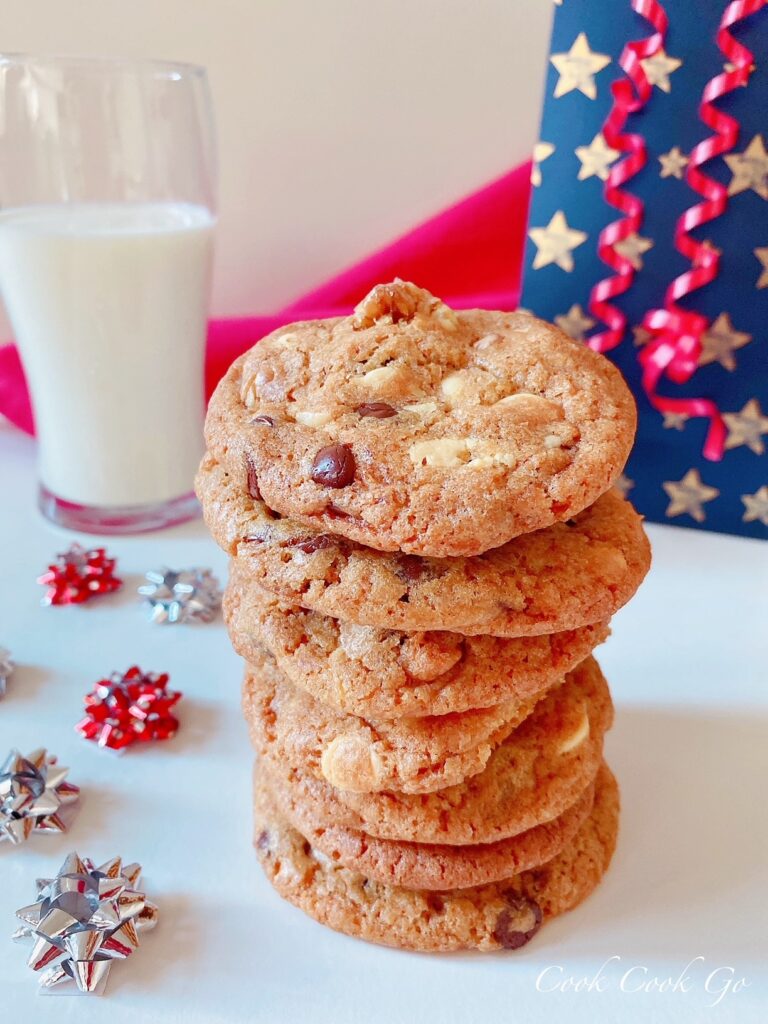
Dette er et af mine yndlingstips til madfotografering. Linjerne og lagene skaber bare mere dybde og indhold i dine madbilleder. En hurtig måde at starte på er at bruge enkle rekvisitter og ingredienser til at skabe linjer og lagdelte effekter.
Småkager er en af de nemmeste fødevarer at demonstrere en linje- og lagdelingseffekt med uden brug af rekvisitter. Jeg har f.eks. lavet disse to slags småkager til jul. Jeg dekorerede nogle små rekvisitter, der fungerer som ledetråde: gaveposer, kort og krymmel. Alt dette skabte en festlig atmosfære omkring kagerne. Ud over at stable kagerne for at skabe lagene, skaber de små gavedekorationer på siden en fin linje. Disse enkle tilføjelser er med til at gøre billederne mere interessante at se på. Det halve glas kold mælk og den engangs-bidte cookie er klare referencer og måske ubevidste sultmotivatorer, der viser, at disse lækkerier allerede bliver nydt.
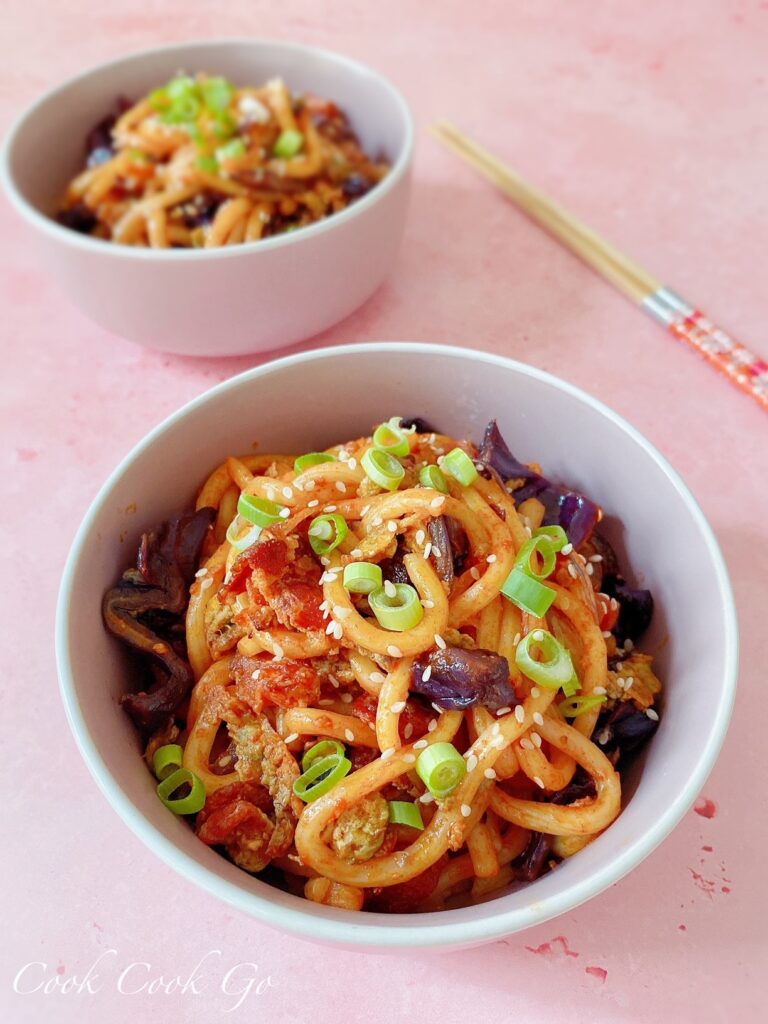
5. Brug kulisser til at forbedre dit spil
Når du starter, er du måske nervøs for, hvordan du skal få din mad til at se mere attraktiv ud. Har jeg brug for fancy rekvisitter og smukkere service? Nej. Du kan hæve præsentationen hurtigt og billigt med et par neutrale backdrops for at skabe en enkel, men tydeligvis iøjnefaldende effekt. Du vil lære, hvordan farver blandes og matcher, hvis du ikke allerede har en god fornemmelse for komplementærfarver!
Personligt reducerer jeg ofte rekvisitterne ved hjælp af baggrunde. Som du kan se på billederne nedenfor, har jeg ikke tilføjet meget til selve skålene. Jeg bruger ofte baggrunde, der matcher farven på mine skåle - hvid og pink i disse to eksempler. Baggrundens farve er enkel, men selve maden er farverig. Der er en balance! Den vigtigste rekvisit, jeg har brugt her, er spisepinde og nogle røde peberfrugter til mine Sichuan Dan Dan-nudler (til venstre) og Udon-nudler (til højre).

Faktisk kan dit køkkenbord eller din bordplade også bruges som baggrund for dine madbilleder, hvis de har den farve, tekstur og stil, du kan lide. Ellers er en investering i et par gode baggrunde helt sikkert den lille udgift værd!
Flere ressourcer til at opgradere din madfotografering
Hvis du vil lære mere om madfotografering på et dybdegående niveau og blive en professionel madfotograf, kan jeg varmt anbefale, at du tjekker ud PinchOfYum madblog, grundlagt af Lindsay og Bjork Ostrom. PinchOfYum er en af mine yndlingsmadblogs på internettet.
Lindsay og Bjork giver en trin-for-trin Ebook om velsmagende madfotografering der er fyldt med tips, tricks og videotutorials, som lærer dig meget af det, du har brug for at vide om madfotografering. Du lærer også, hvordan du redigerer dine madbilleder som en professionel. Indholdet er absolut vindende! Værdien af E-bog er helt sikkert mere værd end den nuværende pris på $29.

Besides Food Photography Ebook, PinchofYum also has an online Food Blogger Community – Food Blogger Pro som lærer dig alt om, hvordan du får succes som madblogger. Hvis du er seriøs omkring madblogging og gerne vil tjene penge på din blog, er Food Blogger Pro et godt sted at lære af brancheeksperter og andre bloggere, som kan hjælpe dig med at udvikle din onlineforretning meget hurtigere. Du kan f.eks. lære tekniske færdigheder om, hvordan du skaber trafik og tjener penge på din madblog på forskellige måder. De tilbyder også tips til madfotografering til deres medlemmer. Hvis du ikke er sikker på, hvor du skal starte, kan du først prøve at lytte til deres ugentlige podcast gratis her.

Det er meget nemt at tilmelde sig. Du kan besøge linket her for at vælge et månedligt eller årligt medlemskab. Hvis du tilmelder dig et årligt medlemskab, får du et års adgang til Nutrifoxsom er et værktøj, der giver dig mulighed for at dele og oprette næringsdeklarationer på dine opskrifter. Det er en rigtig god bonus for alle, der interesserer sig for mad!
Food Blogger Pro is a fun place to meet other creative and talented food bloggers just like you and from all around the world. It’s always nice to be a member of the community that is uplifting and inspiring.

Sidste ord
Jeg håber virkelig, at disse tips til madfotografering har været nyttige, og jeg ønsker dig held og lykke med din madblog/fotorejse. Hvis du har spørgsmål, er du velkommen til at skrive dem i kommentarfeltet nedenfor. Tag nu nogle gode billeder, som vi alle kan nyde!
P.S. Hvis du også vil lære, hvordan du starter en madblog fra bunden, så tjek Sådan starter du en madblog: Trin for trin.


